Set Sound Output via AppleScript

When playing music I usually change my office MacBook’s sound output to a Sonos speaker, which is an AirPlay device. Sometimes the connection freezes and I have to reset output my default device and back to the office speaker. I wanted to automate both of these processes, so I found an AppleScript as a starting point. I modified it and created an Alfred Workflow with a keyword trigger. Here’s my version of the AppleScript. Feel free to modify it for your own use.

-- This script can be used to set/reset the sound output

-- Two devices because sometimes the AirPlay device loses connection
set myDevices to {"LG UltraFine Display Audio", "Office"}

tell application "System Settings"
	-- sometimes it is already open to Sound, which causes an error
	quit
	delay 0.2
	activate
	delay 0.2
	
	tell application "System Events"
		tell process "System Settings"
			set theWindow to first window
			delay 0.2
		end tell
		
		keystroke "Sound"
		delay 0.5
		
		tell application process "System Settings"
			tell its group 2 of scroll area 1 of group 1 of group 2 of splitter group 1 of group 1 of window "Sound"
				tell its radio button 1 of tab group 1
					click
				end tell
				
				delay 0.3
				
				tell its scroll area 1
					try
						set theRows to (every row of outline 1)
					on error error_message number error_number
						display dialog "Error: " & the error_number & ": " & the error_message buttons {"OK"} default button 1
					end try
					
					repeat with myDevice in myDevices
						set device to myDevice as string
						
						set found to false
						-- Sometimes the devide isn't listed yet, so delay and retry
						repeat 5 times
							repeat with aRow in theRows
								try
									if name of static text 1 of group 1 of UI element 1 of aRow is equal to device then
										set selected of aRow to true
										set found to true

										-- Set volume per device
										set volume without output muted
										set volume output volume 10 --100%
										
										exit repeat
									end if
								on error
									display dialog "Error setting output sound to " & device
								end try
							end repeat
							
							if found = true then
								exit repeat
							end if

							delay 0.5
						end repeat
					end repeat
				end tell
			end tell
		end tell
	end tell
	
	quit
end tell

Updated on November 28, 2023 to work with macOS Sonoma 14.1.1.

Updated on March 13, 2024 to retry multiple times if device isn’t listed yet.

Updated on March 21, 2024 to reset volume per device, since the OS remembers the last volume of each device.

Automated Closet Lighting

After building a rack for my workout shoes a couple of weeks ago, I wanted to tackle another thing about the broom closet that has been bugging me for years. It never had a light! I put together a rough video of the entire process.

I’m really happy with how it turned out, especially since I was able to use parts I had in my electronics collection. The whole thing uses a simple circuit, cost less than $10, and doesn’t require WiFi or any fancy connections. The Working of Transistor as a Switch page on Electronics Hub was a big help. I ended up using a PNP transistor in my circuit without resistors because the LEDs were dimming and I wanted maximum brightness.

Updates to Home Assistant Projects

My garage temp sensor, running home-assistant-temperature-monitor stopped working several months ago. I didn’t have time to figure it out and then summer hit, when it’s not important since I don’t heat up the garage before I workout. This weekend I finally got around to troubleshooting the problem.

Turned out I needed to install Adafruit_Python_GPIO. I must have updated my code at some point without fully testing, otherwise I’m not sure how any of it worked before. I didn’t investigate that though; I was more concerned with fixing it and doing some improvements. I updated the OS and everything on the Raspberry Pi since it hadn’t been turned on in quite some time.

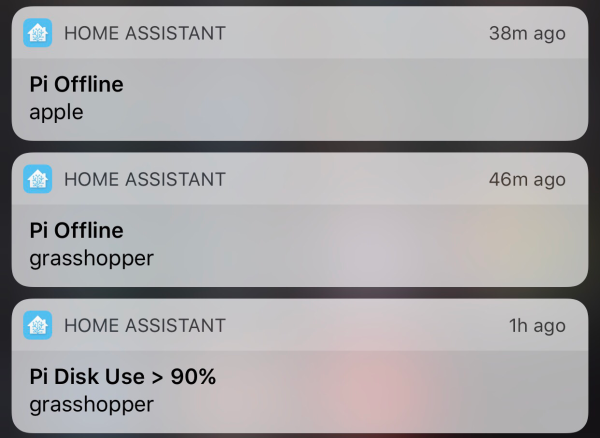
Earlier this year, another Pi on my network, the one running Home Assistant and Pi-hole, ran out of disk space without warning. I’ve wanted to put in a notification system so it never happens again, so I updated home-assistant-pi to report the disk use % to HA. I added an automation to notify me whenever it’s above 90% for one of my Pis. I also reworked all of the automations in home-assistant-pi to make it easier to configure each time I get a new Pi.

img_9705

That all took much longer than I expected. Most of the trouble was trying to understand the Jinja template system used in HA and where it can be applied to configurations. I think I’m finally getting the hang of it.

While writing this post, I found an old draft with some other updates to home-assistant-pi I never published. Maybe I never finished and that’s why everything stopped working! Here’s a list of some previous updates:

  • Fixed errors causing program to crash.
  • It wasn’t reconnecting very well, especially if Home Assistant went away (ex. for a restart after an upgrade). Rewrote how the MQTT connection works.
  • Switch from PushBullet to iOS notifications.
  • Changed show/hide Home Assistant group automations.

Now that this stuff is running again and I have a better understanding of the Home Assistant automation capabilities, I need to continue the series of posts I planned on home automation. It’s been five and a half months since I published Part 1!

Set Mac Volume to a Specific Percentage with an Alfred Workflow

The Touch Bar on the MacBook is a pain in the ass. I’ve been getting sick of fighting with it to adjust volume and wanted an alternative to using the icon in the Mac OS menu bar. I already had some AppleScript code I use to reset volume to start my work day, so I ran with it to make a simple Alfred Workflow.

I didn’t realize how awesome this workflow would be. I’m using it all the time, even on my other Mac, which has the keyboard volume control buttons.

mac-vol-alfred-workflow-screenshot.png

Get it on GitHub.

Home Assistant Pi

With all of the Raspberry Pis I have (now up to 6 after adding “flapper”), I wanted to get a bunch of data in Home Assistant (yes, I’m still working on a larger home automation post) and have an easy way to reboot or shutdown each computer.

I wrote a little app which runs as a service on each Pi. Here’s an example of what shows up in Home Assistant.

home-assistant-pi-groups.png

The Python app and sample Home Assistant configurations are in my home-assistant-pi project on GitHub. Of course it’s all Open Source.

Garage Temperature Sensor & Monitor

I’ve been working on this project here and there for a few weeks, with most of the early work being experimentation. Everything is now up and running and it’s “deployed to production” so to speak. This was my prototyping setup…

After wiring everything together and repurposing a cardboard box, here is a short video to show the final product.

A few notes on how it works:

  • The button toggles monitor mode. The LED inside the button indicates if Monitor mode is on/off.
  • When monitor mode is on and the desired temperature is reached, I get a notification.
  • I should have shown the knob, but all it does is adjust the LCD’s contrast.
  • The thing on the top left of the box is the sensor chip for reading temperature and humidity. Originally it was inside the box behind a little window there but it was picking up too much heat from the Pi and LCD in there.
  • The backlight color of the LCD is based on the measured temperature and updates each time new temperature is read. Anything 32° Farenheit and below is blue, 80° and above is red, and everything in between is based on where it falls within that 32-80 range. As you can see in the example, 48° is a lighter blue. A few degrees warmer and I think it would have started to look more green.
  • Outside temperature/humidity is pulled in from the Dark Sky data in my Home Assistant setup (which I’ll post about soon).
  • Data is sent to Home Assistant via MQTT.

home-assistant-garage.png

Really happy with how things turned out. The Pi  I wrote this in Python and it’s all available as home-assistant-temperature-monitor on GitHub if you want to make your own or use some of the code for your own project. There is also a list of all the components used.

Here are some pictures I took while assembling the enclosure/box.

Making sure the Pi and attached Hat fit right after drilling the holes. Seemed like there was so much room at this point.

img_8663
Everything soldered to the HAT. Amazingly I didn’t make any mistakes and everything worked on the first try. A good prototyping setup, having pictures of my final prototype, and keeping a list of where everything connected was invaluable.

The Raspberry Pi, Hat, LCD, USB cables to power and WiFi, and all of the other wiring jammed in! Reaching inside to get things screwed through the box wasn’t easy.

There is a lot more room in the other part of the box where the sensor, button, and knob are. Nice for the WiFi adapter and cable to come across and have some room.

Update: Adafruit released a new Learn guide that does some similar stuff to this project.

Nesting the House

I installed 2 Nest Protects on Friday, the first thermostat today, and 2 more thermostats should be here tomorrow or Thursday depending on the weather delays with shipping. My house has 4 heating zones, so it’ll be interesting to see how everything works together. I’m leaving the old digital thermostat in the basement because I […]